


Professional Retaining Wall Landscaping Services in Brampton
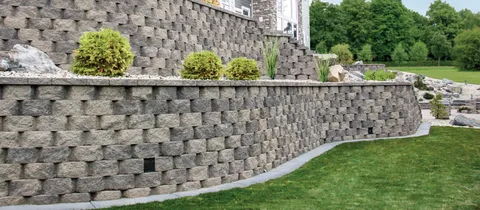
A well-built retaining wall does far more than hold back soil — it transforms a sloped, unusable yard into a functional, beautiful outdoor space. At Target Landscaping, we design and install retaining walls for homeowners and businesses across Brampton, solving drainage problems, preventing erosion, and adding lasting structural and aesthetic value to properties throughout the city — from Bram East to Springdale, Mount Pleasant to Fletcher’s Meadow. Why Your Property Needs a Retaining Wall Sloped or uneven terrain creates more than a design headache. Without proper support, soil erosion can undermine foundations, wash out gardens, and cause water to pool in unwanted areas. A properly engineered retaining wall addresses these issues at the source by holding soil in place, controlling runoff, and creating level, usable terraces from previously wasted space. Beyond their functional role, retaining walls are among the most effective ways to elevate curb appeal. A thoughtfully designed wall creates visual structure, defines garden beds, and can serve as a seating ledge, planter, or backdrop for outdoor living areas. It’s an investment that pays off both in everyday enjoyment and in resale value. Our Retaining Wall Services Our team handles every stage of the retaining wall process, from initial site assessment to final finishing touches: Site Evaluation & Design — Every yard is different, and Brampton properties bring their own set of challenges. Much of the city sits on dense clay soil that holds water and expands and contracts with Ontario’s freeze-thaw cycles — a common cause of retaining wall failure when it isn’t accounted for. We assess soil composition, drainage patterns, slope grade, and wall height requirements before recommending a solution, and for taller or load-bearing walls, we factor in engineering considerations and any applicable City of Brampton permit requirements to ensure long-term stability and compliance. Material Selection — We work with a range of materials to match your budget and style, including natural stone, poured concrete, interlocking concrete block, and timber. Each material offers different durability, maintenance, and aesthetic characteristics, and we’ll help you choose the right fit for your property and climate. Professional Installation — Proper installation is what separates a retaining wall that lasts decades from one that fails within a few seasons. Our crews excavate to the correct depth, install compacted gravel bases, add drainage systems behind the wall, and build with proper batter (the slight backward lean that helps walls resist soil pressure). This attention to detail is especially important here in Brampton, where harsh winters and heavy clay soil put extra stress on poorly built walls, causing cracking, heaving, or shifting within just a few years. Drainage Integration — A retaining wall without proper drainage is a wall waiting to fail. We install perforated drain pipes, gravel backfill, and weep holes as needed to relieve hydrostatic pressure and keep water from building up behind the structure. Finishing & Landscaping Integration — Once the wall is in place, we integrate it seamlessly into your broader landscape design — whether that means adding garden beds along the top, built-in lighting, capstones for seating, or complementary hardscaping like patios and walkways. Types of Retaining Walls We Build Terraced garden walls for sloped backyards, turning unusable grade into multi-level planting areas Structural retaining walls for driveways, foundations, and areas requiring significant load support Decorative low walls for defining flower beds, borders, and property lines Seat walls that double as retaining structures and outdoor seating around patios or fire pits Waterfront and erosion-control walls designed to withstand ongoing water exposure Signs You May Need a Retaining Wall If you’re noticing any of the following on your property, it may be time for a consultation: Visible soil erosion or bare patches on slopes Water pooling near your foundation after rain Cracking or leaning in an existing wall Sloped areas of your yard that go unused Settling or shifting in patios, walkways, or garden beds near a grade change Why Choose Target Landscaping in Brampton Retaining walls are a long-term investment, and poor installation is one of the most common — and costly — landscaping mistakes homeowners encounter. As a local team, we bring hands-on experience with Brampton’s clay-heavy soil, seasonal freeze-thaw conditions, and City permit requirements to every project, ensuring your wall is built to perform for decades, not just look good on installation day. We proudly serve homeowners and businesses throughout Brampton and the surrounding communities, offering: Free on-site consultations and quotes for Brampton properties Local knowledge of soil, drainage, and climate conditions specific to the region Transparent pricing with no hidden costs Warranty-backed workmanship A portfolio of completed retaining wall projects across Brampton neighbourhoods Full-service landscaping so your wall integrates with existing or future outdoor plans Get Started Whether you’re dealing with an eroding slope, planning a full backyard renovation, or simply want to explore your options, our Brampton-based team is ready to help. Contact Target Landscaping today for a free, no-obligation quote and let’s turn your challenging terrain into one of the best features of your property.
Interlocking Stone Installation Ontario: The Complete Homeowner’s Guide
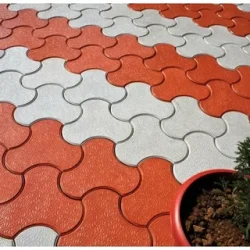
Interlocking stone installation in Ontario is the process of laying individually manufactured concrete or natural stone units — called pavers — over a compacted aggregate base to create driveways, walkways, patios, and pool decks that flex with ground movement instead of cracking like poured concrete. Ontario’s freeze-thaw climate makes proper base preparation, paver selection, and joint compaction more important here than in almost any other Canadian region. This guide covers what interlocking stone is, why it outperforms concrete and asphalt in Ontario conditions, how professional installation works step by step, what it costs, and how to choose a contractor. What Is Interlocking Stone? Interlocking stone refers to precast concrete or natural stone units manufactured with edges that lock together under lateral pressure. Unlike poured concrete slabs, which form a single rigid surface, interlocking pavers are installed as thousands of separate units bedded in sand over a compacted base. This segmented structure allows the surface to shift slightly with frost heave and settle back into place without cracking. The units come in three main categories: Concrete pavers — manufactured in uniform shapes and colors, the most common choice for Ontario driveways. Natural stone pavers — flagstone, granite, or limestone units with irregular or cut edges, used for patios and premium driveway sections. Permeable pavers — designed with wider joints and specialized base material to let stormwater drain through rather than pool on the surface. Why Interlocking Stone Suits Ontario’s Climate Ontario experiences dozens of freeze-thaw cycles each winter. Water that seeps into cracks in concrete expands when it freezes, widening the cracks with each cycle. A poured concrete driveway typically shows its first cracks within five to seven years under this stress. Interlocking pavers avoid this failure mode for three reasons: Segmented flexibility. Each paver can move independently, so ground heave redistributes across many small units instead of concentrating stress on one slab. Built-in drainage. The joints between pavers, combined with a properly graded aggregate base, let water escape downward rather than sitting on the surface and refreezing. Selective repair. A sunken or cracked paver can be lifted, the base corrected, and the same paver reset — without cutting out and repouring an entire section, as concrete repair requires. The Professional Installation Process Interlocking stone installation Ontario contractors follow a sequence that determines whether the finished surface lasts fifteen years or fails within three. Skipping or shortcutting any step below is the leading cause of premature paver failure. Step 1: Site Assessment and Design The installer measures the area, checks existing drainage patterns, and identifies the finished grade needed to direct water away from the house foundation. Slope of at least 1–2% away from structures is standard practice for driveways and patios. Step 2: Excavation The installer removes existing concrete, asphalt, soil, or turf to a depth that accommodates both the paver and the base. Ontario driveways generally require excavation of 250–300 mm (10–12 inches) to support vehicle loads; pedestrian walkways and patios need less, typically 150–200 mm (6–8 inches). Step 3: Base Installation and Compaction A layer of crushed granular aggregate (commonly Granular A) is spread in lifts of 75–100 mm and compacted with a plate compactor after each lift. This base layer is the single most important factor in long-term stability. An under-compacted or too-thin base is the primary cause of sinking, shifting, and paver separation within the first few years. Step 4: Bedding Sand Layer A thin, screeded layer of coarse sand (typically 25 mm) is placed over the compacted base to create a level surface for the pavers to sit on. This layer is not compacted before paver placement — compaction happens after the pavers are laid. Step 5: Paver Placement Pavers are laid by hand according to the chosen pattern — herringbone, running bond, basketweave, or a custom design — working from a fixed edge to maintain alignment. Cuts around curves, drains, and edges are made with a wet saw for a clean fit. Step 6: Edge Restraint Installation Plastic, aluminum, or concrete edge restraints are anchored along the perimeter to prevent pavers from spreading outward under load over time. Without edge restraints, even a well-compacted installation will gradually widen at the joints and loosen. Step 7: Joint Sand and Final Compaction Polymeric sand is swept into the joints between pavers, then the entire surface is compacted with a plate compactor fitted with a protective pad. The polymeric sand is activated with water, forming a semi-rigid bond that locks each paver against its neighbors — this is the step that gives interlocking pavers their name and their structural strength. Step 8: Sealing (Optional but Recommended) A penetrating or film-forming sealer applied after 60–90 days of curing protects the surface from salt damage, staining, and sand erosion, and enhances color retention. Interlocking Stone Applications Application Typical Paver Depth Base Depth Driveway 60–80 mm 250–300 mm Walkway 40–60 mm 150–200 mm Patio 40–60 mm 150–200 mm Pool deck 40–60 mm 150–200 mm (with permeable base) Driveways require thicker pavers and deeper bases than walkways or patios because they must support the point-loads of vehicle tires, not just distributed foot traffic. Cost Factors for Interlocking Stone Installation in Ontario Pricing varies by project, but the main cost drivers are consistent across Ontario: Square footage — larger areas reduce the per-square-foot cost due to mobilization efficiency. Excavation depth and site access — removing existing concrete or asphalt, and difficult access for equipment, both add labor cost. Paver material — standard concrete pavers cost less than natural stone or premeable systems. Pattern complexity — herringbone and custom curved layouts require more cutting and labor than a straight running-bond pattern. Drainage requirements — sites with poor natural drainage may need catch basins, additional grading, or permeable paver systems. Homeowners should request an itemized quote that separates excavation, base material, paver supply, and labor, since these line items reveal whether a contractor is budgeting for adequate base depth or cutting corners to win the bid on price alone. Common Interlocking Driveway Problems
Flagstone Installation in Ontario: What Homeowners Need to Know Before They Start
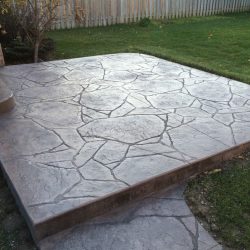
Flagstone installation is the process of laying irregular or cut natural stone slabs, typically limestone, sandstone, bluestone, or quartzite, onto a prepared base to create patios, walkways, and pool decks. In Ontario, the process must also account for freeze-thaw cycles, which makes base preparation the single biggest factor in how long a flagstone surface lasts. What Is Flagstone Made Of? Flagstone is a general term for flat, naturally split sedimentary or metamorphic rock, most commonly limestone, sandstone, bluestone, or quartzite, cut or split into slabs one to three inches thick for paving use. Each stone type has different properties. Bluestone is dense and low-porosity, which makes it more resistant to Ontario’s winter freeze-thaw cycles. Limestone is softer and more porous, so it needs a quality sealant to prevent staining and surface pitting. Sandstone sits between the two, offering warm color tones but requiring similar sealing attention. Quartzite is the hardest and most weather-resistant of the group, though it typically costs more per square foot. The right choice depends on the property’s drainage, the surface’s use case (walkway, pool deck, or patio), and the homeowner’s maintenance tolerance. Many of these same stone types are also used for natural stone steps, which follow similar base and jointing principles. How Is Flagstone Installed? Flagstone installation follows five stages: excavation, base preparation with compacted gravel, a bedding layer of sand or stone dust, stone placement and leveling, and joint filling with polymeric sand, stone dust, or mortar. This process is similar across most natural stone hardscaping projects, though slab thickness and joint spacing vary by application. Excavation typically removes six to eight inches of soil to make room for a compacted gravel base, which provides drainage and prevents the frost heave that is common in Ontario clay soils. The bedding layer, usually screenings or coarse sand, sits on top, allowing each irregular stone to be leveled individually. Installers then place the stones with consistent joint spacing, cutting pieces as needed to fit edges and curves. The final step, joint filling, affects both appearance and function. Polymeric sand locks stones in place and resists weed growth, while a mortared joint gives a more formal, seamless look but is less forgiving of ground movement. Dry-Laid vs. Mortared Flagstone: Which Method Fits Your Project? Dry-laid flagstone rests on a compacted gravel-and-sand base without mortar, allowing natural drainage and seasonal movement, while mortared flagstone is set on a concrete slab with cement joints for a rigid, formal finish. Dry-laid installation is the standard choice for Ontario patios and walkways because it flexes during freeze-thaw cycles rather than cracking. It is also easier to repair, since a single stone can be lifted and reset without disturbing the rest of the surface. Mortared flagstone, by contrast, is better suited to covered areas or regions with minimal ground movement, since a fully bonded surface has no give. For most exterior residential projects in the Greater Toronto Area, contractors favor the dry-laid method due to the region’s climate. How Much Does Flagstone Installation Cost in Ontario? Flagstone installation in Ontario typically costs more than poured concrete or standard interlocking pavers, with pricing driven by stone type, slab thickness, site accessibility, and layout complexity. Irregular “flagged” layouts, where stones are fitted together like a puzzle, take more labor time than modular cut patterns and usually increase the overall price. Site conditions matter too. A project requiring extensive excavation, drainage correction, or retaining wall work will cost more than a flat, easily accessible yard. Getting an accurate number means having a contractor assess the site directly, since square-footage estimates alone do not capture excavation depth, base material needs, or drainage requirements. How Long Does Flagstone Last, and What Maintenance Does It Need? A properly installed flagstone surface can last several decades, provided the base was compacted correctly and the stone is resealed periodically to prevent moisture penetration and staining. Maintenance is mostly preventative. Resealing every two to three years protects porous stones like limestone and sandstone from water absorption, which is the main driver of cracking during winter freeze-thaw cycles. Joint sand should be topped up as it settles, and any low or shifting stones should be promptly releveled, since standing water in a low spot accelerates erosion beneath them. Homeowners who skip these steps are not at risk of the stone itself failing, since the material is highly durable, but the base beneath it can shift, leading to uneven surfaces over time. Choosing a Flagstone Contractor in Ontario The quality of a flagstone installation depends more on base preparation than on the stone itself, so the deciding factor when hiring a contractor should be their process for excavation, drainage, and compaction, not just the stone samples they show you. A contractor who has been manufacturing and installing natural stone since the late 1990s, with direct experience in Ontario’s soil and climate conditions, brings a practical understanding of how flagstone patios, walkways, and pool decks hold up locally. Ask to see completed projects that are at least a few years old. A surface that has survived several winters without heaving or shifting is the clearest evidence of a properly built base. Frequently Asked Questions Can flagstone be installed over an existing concrete patio? Flagstone can be installed over existing concrete using a mortared, thin-set method, provided the concrete slab is structurally sound, properly sloped for drainage, and free of major cracks. Does flagstone get slippery when wet? Flagstone has a naturally textured, non-uniform surface that generally provides better slip resistance than polished stone or smooth concrete, though a penetrating (non-glossy) sealer should be used to preserve that texture. How long does flagstone installation take? A typical residential flagstone patio or walkway takes between three and seven days to install, depending on the surface area, site accessibility, and whether excavation or drainage correction is required. Can flagstone be installed in winter? Flagstone installation is possible in colder months, but most Ontario contractors recommend spring through fall, since frozen ground makes proper excavation and base
Best Landscape Retaining Wall Contractor in Ontario
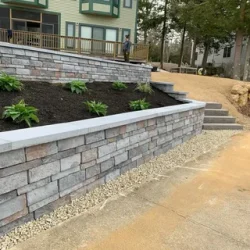
Finding a reliable Landscape Retaining Wall Contractor in Ontario can transform your outdoor space completely. A strong retaining wall protects your soil, prevents erosion, and adds lasting value to your property. Why Your Property Needs a Retaining Wall Ontario’s climate brings heavy rain, freezing winters, and shifting soil. Without proper support, slopes can erode quickly. Retaining walls hold back soil and manage water flow effectively. They also create usable space on sloped yards. You gain flat areas for gardens, patios, or seating zones. A well-built wall adds both function and beauty to your landscape. Homeowners often underestimate how much a wall improves curb appeal. Buyers notice clean, structured yards. A professional wall installation can boost resale value significantly. Choosing the Right Contractor for Your Yard Not every contractor understands local soil conditions. Ontario soil varies from clay-heavy to sandy, and each type behaves differently under pressure. A skilled contractor studies your yard first. They check drainage patterns, slope angles, and soil type before building anything. This step guides every design decision that follows. At targetlandscaping, our team inspects every site carefully. We design walls that match your yard’s unique needs, not a generic template. This attention to detail prevents future cracking or shifting. Experience matters too. Contractors who have worked across different Ontario regions understand frost heave risks. They know how deep footings must go to survive winter freeze-thaw cycles. Materials That Matter Wall materials affect both looks and durability. Popular choices include concrete blocks, timber, and natural stone. Each material offers different benefits depending on your goals. Concrete blocks are affordable and quick to install. Timber walls look rustic but need more maintenance over time. Stone walls last longer and blend naturally into any landscape. Natural Stone Steps Installation in Ontario Many homeowners pair retaining walls with matching stone steps. This service creates a seamless transition between different yard levels. Stone steps add safety on sloped paths. They also give your landscape a cohesive, high-end appearance. Choosing the right stone size and texture matters for grip and drainage. Our team at targetlandscaping recommends combining walls and steps in one project. This approach saves time and ensures consistent design throughout your yard. Interlocking Stone Solutions Beyond walls and steps, many clients ask about interlocking pavers for driveways or patios. Interlocking Stone Installation Ontario projects pair beautifully with retaining wall work. These stones lock together tightly, creating strong, flexible surfaces. They resist cracking better than poured concrete in freeze-thaw climates like Ontario’s. Combining a retaining wall with interlocking stone paths creates a unified outdoor design. Your yard feels intentional, not patched together piece by piece. What to Look for in a Contractor Before hiring anyone, ask a few key questions. Do they carry insurance? Do they offer warranties? Can they show past project photos? A trustworthy landscaping contractor will answer these questions confidently. They should also provide a clear, written estimate before starting work. Avoid contractors who rush the process or skip site inspections. Proper planning prevents costly mistakes later. Quality work always starts with a solid foundation, literally. Ask about drainage solutions too. Poor drainage is the leading cause of wall failure. A good contractor installs gravel backfill and drainage pipes behind every wall. The Installation Process Every project starts with a consultation. The contractor visits your property and discusses your goals. They measure the slope and check soil conditions. Next comes the design phase. You’ll review material options, wall height, and layout. A clear plan avoids surprises once construction begins. Excavation follows the design approval. Workers dig a trench for the wall’s base. Proper depth here prevents shifting and settling later. Then comes the base layer. Crushed gravel creates a stable foundation. This step is often overlooked, yet it’s critical for long-term durability. Wall construction begins after the base sets. Blocks or stones are placed carefully, layer by layer. Each layer is checked for level and alignment. Finally, backfilling and drainage installation complete the project. Soil is compacted behind the wall. Drainage pipes redirect water away from the structure. Local Expertise Makes a Difference Working with a local company brings real advantages. Local contractors understand municipal codes and permit requirements across Ontario. This knowledge saves you time and avoids legal headaches. They also know which suppliers offer the best local materials. Shorter delivery times mean faster project completion. Local reputation matters too, since past clients can vouch for quality work. targetlandscaping has built strong relationships with Ontario suppliers over the years. This means better pricing and faster access to quality materials for every project. Maintenance Tips for Long-Lasting Walls Even the best walls need occasional care. Inspect your wall each spring for cracks or shifting. Early detection prevents small issues from becoming major repairs. Keep drainage clear of debris. Blocked drains cause water buildup, which weakens wall structure over time. Clear leaves and dirt regularly, especially after storms. Trim nearby plants and roots. Roots can push against walls and cause gradual damage. Regular yard maintenance protects your investment for decades. Watch for bulging or leaning sections along the wall face. These signs often point to drainage problems or soil pressure buildup. Address them early before they worsen. Reseal natural stone surfaces every few years. Sealing protects against staining and moisture damage. It also keeps colors vibrant through harsh Ontario winters. Schedule a professional inspection every two or three years. Trained eyes catch subtle issues homeowners often miss. This small step extends your wall’s lifespan significantly. Why Choose Targetlandscaping Choosing the right team matters as much as choosing the right materials. At targetlandscaping, we combine local knowledge with hands-on craftsmanship. Our crews handle everything from initial design to final cleanup. We prioritize clear communication throughout every project. You’ll always know what’s happening and why. We also specialize in complementary services. Alongside wall building, we offer natural stone steps and Interlocking Stone Installation Ontario for complete yard transformations. Conclusion A well-built retaining wall protects your property and enhances its beauty. Choosing an experienced Landscape Retaining Wall Contractor in Ontario ensures
Interlocking Wall Installation in Brampton: A Complete Guide to Durable Retaining Walls
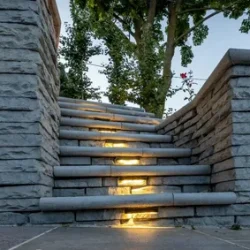
Interlocking wall installation in Brampton is the process of building segmental retaining or garden walls from precision-cut concrete or natural stone units that lock together mechanically, without mortar, to hold back soil, define grade changes, and shape outdoor living spaces. Unlike poured concrete or timber walls, interlocking walls rely on unit weight, pin or lip connections, and engineered backfill to resist soil pressure, which makes them faster to install, easier to repair, and better suited to Brampton’s freeze-thaw climate than older wall-building methods. For homeowners in Brampton — a city built on a mix of clay-heavy soil, rolling grade changes, and neighbourhoods where lot lines meet elevation changes of a foot or more — interlocking walls solve a specific problem: they stop soil erosion, create usable flat space on a sloped yard, and separate a driveway or patio from a planting bed without the cracking and heaving that plagues poorly built alternatives. Why Soil and Climate in Brampton Change How a Wall Should Be Built Brampton sits on soil that is predominantly clay and clay-loam, a soil type that expands when saturated and contracts when dry. This matters enormously for wall construction because clay soil exerts far greater lateral pressure against a retaining structure than sandy or well-draining soil does. A wall built without accounting for this pressure — meaning no proper base, no drainage stone, and no engineered backfill — will bow, lean, or fail within a few winters. Add to that Ontario’s freeze-thaw cycle, which typically runs from November through March. Water trapped behind a wall freezes, expands, and pushes outward; when it thaws, the wall settles slightly. Repeated dozens of times each winter, this cycle is what causes most retaining wall failures in the Brampton area — not the stone itself, but the absence of a drainage plan behind it. Any legitimate interlocking wall installer in Brampton designs the base and backfill around this reality before a single block is placed. Core Components of a Properly Installed Interlocking Wall A structurally sound interlocking wall is built from four layers working together, not from stacked blocks alone. Excavation and sub-base: The trench is dug below the frost line in the load-bearing zone, typically 150–300 mm deep depending on wall height, then filled with compacted granular base material (commonly 3/4″ clear stone or granular A) to create a stable, non-shifting foundation. Base course: The first row of interlocking units is set into the compacted base and leveled in both directions — front-to-back and side-to-side — since every subsequent course follows the alignment of this row. Drainage system: A perforated weeping tile is placed at the base of the wall, wrapped in geotextile fabric, and surrounded by clear stone. This channel carries groundwater away from the wall structure instead of letting it pool and freeze against the blocks. Backfill and geogrid reinforcement: For walls above roughly 1 metre in height, horizontal geogrid mesh is embedded between courses and extended back into the soil, anchoring the wall into the slope itself rather than relying on the blocks’ weight alone. Skipping any one of these layers is the single most common reason interlocking walls fail prematurely, regardless of how attractive the finished stone appears on installation day. Choosing the Right Interlocking Wall System Not every interlocking product performs the same way, and the choice depends on wall height, load, and design intent. Gravity walls use the sheer weight and setback angle of stacked units to resist soil pressure, and they’re appropriate for walls up to roughly 1 metre without geogrid reinforcement. Pinned or lipped systems use fiberglass pins or a rear lip on each block to mechanically lock courses together, allowing for taller structures when combined with geogrid. Segmental retaining wall (SRW) block systems, made from high-density concrete, are the most common choice for driveway edges, tiered gardens, and property-line grade changes because they combine engineered strength with a wide range of finishes — from smooth contemporary faces to tumbled, weathered textures that mimic natural stone. Natural stone walls, built from fieldstone or armor stone, offer a different aesthetic and are typically dry-stacked or set with select mechanical anchoring; they carry a higher material cost but suit properties aiming for a rustic or estate-style look rather than a manufactured finish. Interlocking Wall vs. Timber, Poured Concrete, and Gabion Alternatives Homeowners comparing wall materials in Brampton generally weigh four options. Timber retaining walls cost less upfront but degrade within 10–15 years as the wood absorbs moisture and rots, particularly in clay soil that holds water against the timber face. Poured concrete walls offer strength but require formwork and curing time, and are difficult to repair if a section cracks — the entire pour is compromised as a single structural unit. Gabion walls (stone-filled wire cages) drain exceptionally well and suit rugged, industrial aesthetics, but they consume more depth of yard space for the same wall height and aren’t typically chosen for front-yard or patio-adjacent applications. Interlocking concrete or stone walls sit in the middle: a 40–60 year service life when installed correctly, individual units that can be replaced without rebuilding the wall, and a finish range that suits both formal and naturalistic landscape designs. What Affects the Cost of Interlocking Wall Installation in Brampton Interlocking wall installation Brampton market is driven by a combination of factors rather than a flat per-square-foot rate. Wall height is the largest variable — walls under 60 cm typically don’t require engineering review or geogrid, while anything approaching or exceeding 1 metre often needs both, along with a building permit from the City of Brampton in many cases. Site access matters as well: a backyard wall requiring hand-carried materials through a narrow side yard costs more per linear foot than a front-yard wall accessible to equipment. Excavation volume, drainage complexity, block or stone selection, and whether the existing soil needs to be hauled away and replaced with granular fill all factor into the final quote. As a general guide, straightforward gravity walls under a metre tend to
Landscape Retaining Walls in Canada: A Complete Guide for Homeowners
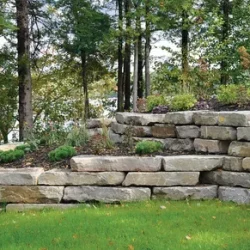
A retaining wall is a structure engineered to hold back soil and resist lateral earth pressure, allowing a property to manage sloped or uneven terrain safely. In Canada, where freeze-thaw cycles, heavy spring runoff, and clay-rich soils are common, a retaining wall is rarely just a decorative feature — it is a functional system that protects foundations, prevents erosion, and creates usable outdoor space on land that would otherwise be too steep or unstable to enjoy. This guide breaks down what a retaining wall actually does, the materials used across Canadian climates, how the installation process works, and what determines cost and longevity — so you can make an informed decision before hiring a contractor. What Problem Does a Retaining Wall Solve? Any property with a grade change —Landscape Retaining Walls in Canada a slope toward a house, a raised garden bed, a sloped backyard bordering a neighbour’s lot — is vulnerable to soil movement. Water saturates the upper soil, gravity pulls it downward, and over time this causes erosion, uneven lawns, cracked patios, and in severe cases, water intrusion into basements. A retaining wall interrupts that movement by holding soil in place at a defined elevation, while built-in drainage channels the water away instead of letting it pool against a foundation. In this sense, the wall’s core job is twofold: structural (holding back earth) and hydrological (managing water). A wall that only looks good but lacks proper drainage will eventually fail, regardless of the material used. Materials Used for Retaining Walls in Canada The right material depends on wall height, soil type, budget, and the aesthetic of the surrounding landscape. Interlocking concrete blocks — The most common choice for residential walls under 1.2 metres. They’re engineered with a slight setback per course for stability, resist moisture well, and come in dozens of finishes that mimic natural stone at a lower cost. Natural stone — Fieldstone, limestone, or granite walls offer a timeless, organic look and exceptional durability, often lasting decades longer than manufactured alternatives. They cost more due to the labour involved in fitting irregular stones. Poured concrete — Used for taller or load-bearing walls, particularly where a driveway or structure sits above the wall. It requires engineering sign-off in most municipalities once height thresholds are exceeded. Timber — Less common today due to a shorter lifespan in wet Canadian climates, though still used for low garden walls or rustic-style landscaping. The Installation Process A properly built retaining wall follows a sequence that determines whether it lasts five years or fifty: Site assessment and design : A contractor evaluates soil composition, slope angle, drainage patterns, and the wall’s intended height to determine footing depth and material. Excavation : The base trench is dug below the frost line where required, since Canadian frost heave can shift a shallow foundation over a single winter. Base preparation : A compacted gravel base, typically 15–20 cm deep, provides a stable, well-draining foundation for the first course. Drainage installation : Perforated pipe and washed gravel backfill are placed behind the wall to redirect groundwater away from the structure, preventing hydrostatic pressure buildup. Wall construction : Blocks or stones are laid course by course, often with a slight rearward batter for taller walls to counteract soil pressure. Backfilling and capping : Soil is backfilled in layers and compacted, and a cap course finishes the top edge for both appearance and water-shedding. Skipping the drainage step is the single most common cause of retaining wall failure in Canada — a wall can be built with premium stone and still bulge or collapse within a few seasons if water isn’t managed properly. What Affects the Cost? Pricing varies by region, but the main cost drivers are consistent nationwide: wall height (cost increases non-linearly as height grows, due to engineering and reinforcement needs), material choice, site accessibility for equipment, and whether drainage or excavation is complicated by existing structures, trees, or utility lines. Permits may also be required once a wall exceeds a certain height — commonly around one metre, though this threshold varies by municipality. Maintenance and Lifespan A well-built wall with proper drainage requires minimal upkeep: periodic checks for bulging, cracking, or gaps between blocks, clearing debris from weep holes, and re-leveling any settled capstones. Concrete and stone walls can last 25–50+ years when installed correctly, but poor drainage or freeze-thaw damage can significantly shorten that lifespan. Choosing the Right Contractor Because a retaining wall is a structural investment rather than a purely cosmetic one, it’s worth confirming that a contractor accounts for local frost depth, provides engineered drainage (not just a wall face), and can speak to soil-specific considerations for your property — clay soils, for instance, retain water and exert more lateral pressure than sandy soils, which changes how a wall should be engineered. A retaining wall done right doesn’t just improve how a yard looks — it protects the property behind it for decades.
Interlock Driveway Installation in Oakville: A Complete Homeowner’s Guide

Oakville’s mix of mature tree-lined streets, lakeside properties, and newer subdivisions means driveways here face a wide range of demands — from heavy freeze-thaw cycles to root intrusion and heavy vehicle loads. For homeowners weighing their options, interlock driveway installation in Oakville has become the preferred choice over plain concrete or asphalt, and for good reason: it combines structural performance with design flexibility that few other surfaces can match. This guide breaks down what interlocking pavers actually are, how a proper installation unfolds, what affects pricing, and how to keep a finished driveway looking new for decades. What Makes Interlocking Pavers Different from Concrete or Asphalt Interlocking pavers are individual concrete or clay units laid in a specific pattern over a compacted aggregate base, then locked together with joint sand. Unlike a poured slab, an interlocking surface isn’t one continuous piece — it’s a system of thousands of small units working together. That distinction matters more than most homeowners realize. Because the surface is segmented, it flexes slightly with ground movement instead of cracking. Oakville’s clay-heavy soil and freeze-thaw winters are exactly the conditions that cause monolithic concrete driveways to heave and split within a decade. A properly engineered paver base, by contrast, distributes stress across the joints rather than concentrating it in one weak point. The Installation Process, Step by Step A durable interlock driveway is built from the ground up, and skipping any stage below is usually where failures start. Site assessment and grading plan. A contractor evaluates existing drainage, slope, and soil conditions before quoting the job. Poor grading is the single most common cause of long-term paver problems, so this step deserves real attention rather than a quick visual glance. Excavation. The old surface and enough subsoil are removed to accommodate the base depth — typically 8 to 12 inches for a residential driveway carrying vehicle loads. Base construction. Crushed granular material (commonly clear stone or graded gravel) is placed in lifts and compacted with a plate compactor. This base layer is what actually bears the weight of vehicles; the pavers on top are essentially a wear surface. Edge restraints. Aluminum or plastic edging is anchored along the perimeter to stop pavers from creeping outward over time — a detail that’s easy to skimp on but critical for long-term stability. Bedding sand and laying pattern. A thin, screeded layer of coarse sand creates a level bed for the pavers, which are then laid according to the chosen pattern — herringbone, running bond, or a custom design. Cutting and fitting. Edge pieces and borders are cut to fit tightly against garage doors, walkways, and property lines. Joint sand and compaction. Polymeric sand is swept into the joints and vibrated down with a plate compactor, then activated with water to bind the units together and resist weed growth and ant intrusion. Sealing (optional but recommended). A penetrating or film-forming sealant enhances color, reduces staining, and makes winter salt exposure easier to manage. What Affects the Cost of an Interlock Driveway in Oakville Pricing varies based on square footage, paver style, base depth requirements, drainage complexity, and equipment accessibility. A straightforward rectangular driveway with standard pavers will cost less per square foot than a curved design with border accents, multiple paver colors, or permeable paver systems designed for stormwater management — an increasingly relevant consideration given Oakville’s stormwater bylaws in newer developments. Homeowners should also budget for proper base preparation rather than cutting corners here. A driveway that looks identical on installation day can perform very differently over five winters, depending entirely on what’s underneath the surface. Maintenance: Keeping an Interlocking Driveway Looking New Interlock surfaces are low-maintenance compared to asphalt, but they aren’t maintenance-free. A yearly rinse, prompt attention to any settling pavers, and periodic joint sand top-ups will keep the surface performing well. Resealing every two to four years, depending on traffic and sun exposure, helps prevent sand erosion and color fading. Because individual pavers can be lifted and replaced, oil stains or cracked units don’t require redoing the entire driveway — a genuine advantage over poured surfaces. Choosing a Local Installer Given how much of an interlock driveway’s long-term performance depends on base work that’s invisible once the project is finished, the contractor’s process matters as much as the paver brand. Oakville homeowners are best served by asking prospective installers about base depth, compaction equipment, drainage planning, and warranty terms before signing a contract — questions that distinguish an experienced paving crew from one simply laying stone on dirt. A well-executed interlock driveway installation in Oakville isn’t just a cosmetic upgrade. Done correctly, it’s an investment in a surface built to handle real Ontario winters while adding lasting curb appeal to the property.
Trusted and Professional Landscape Retaining Wall Contractor Ontario
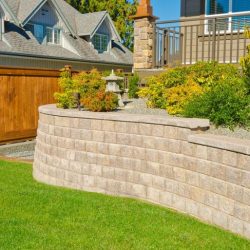
Target Landscaping designs, engineers, and installs landscape retaining walls across Ontario from its base in Brampton. A landscape retaining wall is a structure that holds back soil to control a change in ground elevation, prevent erosion, and create a level, usable outdoor space. We build segmental block, natural stone, armor stone, and poured concrete walls that meet the Ontario Building Code, manage groundwater, and last for decades. The sections below explain what these walls do, how we build them, when Ontario law requires a permit, and what determines the final cost. What Is a Landscape Retaining Wall? A landscape retaining wall is a load-bearing structure that resists lateral soil pressure and holds a higher grade in place behind a lower one. The soil it holds back is called the retained material, and the sideways force that material exerts is called active earth pressure. This pressure increases sharply with height: a wall holding back two feet of soil carries a modest load, while doubling the height more than doubles the force. A retaining wall differs from a freestanding garden wall because it carries a structural load on one face, which is why height, drainage, and base preparation determine whether it stands for thirty years or fails within five. Why Do You Need a Retaining Wall? A retaining wall solves four common landscape problems on sloped or graded properties. It stops soil erosion by anchoring loose earth that rain and snowmelt would otherwise wash downhill. It converts an unusable slope into flat, functional space for a patio, garden bed, lawn, or driveway. It manages surface water and protects foundations by directing runoff away from the home. It also visually defines outdoor areas, creating terraces, raised planters, and seating that give the yard structure and depth. Properties across Ontario sit on clay-heavy soils that swell when wet and shift during freeze-thaw cycles. On these soils a properly drained, properly based retaining wall is not decorative — it is the structure that keeps a graded yard stable through the seasons. What Types of Retaining Walls Do We Build? Target Landscaping builds four wall types, and the right one depends on height, soil, drainage, and the look you want. Segmental retaining wall (SRW) block is the most common residential choice in Ontario. These interlocking concrete units stack without mortar, flex slightly with ground movement, and accept geogrid reinforcement for taller builds. Brands such as Unilock and Allan Block fall into this category. Natural stone delivers a permanent, individual character that no manufactured product matches. Each stone is unique, and a dry-laid or mortared natural stone wall ages into the landscape rather than against it. Armor stone uses large quarried blocks set in a stepped or stacked pattern. It suits steep grades, shorelines, and properties that need a rugged, low-maintenance barrier with significant mass. Poured concrete provides the highest structural capacity for cantilevered and engineered walls. It is the typical choice when a wall must carry a surcharge load such as a driveway, deck, or structure above it. How Does Target Landscaping Build a Retaining Wall? We build every wall in the same sequence, and each step protects the one before it. The process is what separates a wall that holds from a wall that leans. Site assessment and design. We measure the grade, identify the soil type, locate property lines and utilities, and confirm where water moves across the site. We then design the wall height, batter, and footprint based on those conditions rather than on a fixed template. Excavation and base preparation. We excavate to firm subsoil and remove organic material, which compresses and causes settlement. We then place and compact a granular base — typically crushed gravel — to create a stable, level leveling pad. Drainage installation. We install a perforated drainage pipe behind the base and backfill the wall with free-draining granular stone. Water is the most common cause of retaining wall failure, so we give it a path out before it can build pressure behind the wall. Wall construction and reinforcement. We set each course level, maintain the engineered setback, and install geogrid soil reinforcement where the height requires it. Geogrid ties the wall and the retained soil into a single reinforced mass. Backfill, capping, and finish grading. We compact backfill in lifts, secure the cap units, and grade the surrounding ground to shed water away from the structure. Do You Need a Permit for a Retaining Wall in Ontario? In Ontario, a retaining wall with more than 1.0 meter (about 3 feet 3 inches) of exposed height generally requires a building permit and an engineered design. Under the Ontario Building Code, a retaining wall exceeding 1,000 mm in exposed height adjacent to public property, access to a building, or property the public can enter is classified as a designated structure and must be designed to Part 4 of the Code by a licensed Professional Engineer. Exposed height is measured from the finished grade at the base of the wall to the finished grade at the top — not from the buried footing. A drop greater than 600 mm (24 inches) between walking surfaces also typically requires a guardrail where the public has access. Walls under 1.0 metre often do not require a permit, but they are not exempt from standards. They must still sit on a stable base, drain properly, and use materials suited to the load and the climate. Requirements also vary by municipality, and some require a site alteration permit or impose setback rules even for shorter walls. Target Landscaping confirms your municipality’s requirements, coordinates engineered drawings as needed, and handles permit submission so your wall is both safe and compliant. What Determines the Cost of a Retaining Wall? The cost of a retaining wall is driven by height, material, site access, and engineering, not by length alone. Height is the largest single factor because taller walls require deeper bases, more reinforcement, geogrid, and often engineering. Material choice changes the price substantially: segmental block costs less than
Driveway Interlocking Pavers Installation in Ontario: The Complete Homeowner’s Guide
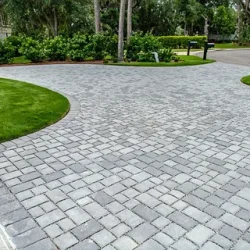
Driveway interlocking pavers installation is the process of building a driveway from individual precast concrete units laid over an engineered base, locked together by sand-filled joints and edge restraints. In Ontario, where the ground freezes and thaws repeatedly through the winter, this method has become the preferred alternative to poured concrete and asphalt because a paver surface flexes with seasonal ground movement instead of cracking against it. The result is a driveway that carries vehicle loads, sheds water, and holds its appearance for decades. A properly installed interlocking driveway is far more than a decorative surface — it is a layered structural system, and the quality of what lies beneath the pavers matters more than the pavers themselves. Target Landscaping builds these systems across Brampton and the surrounding Ontario region, and this guide explains how the work is done, why the base is decisive, and how to recognize an installation that will last. Why Interlocking Pavers Outperform Concrete and Asphalt in Ontario Ontario’s climate is the deciding factor. Poured concrete is rigid; when the ground heaves during a hard frost, the slab has nowhere to move and eventually cracks, and once it cracks, water enters and the damage compounds each winter. Asphalt softens in summer heat, hardens and becomes brittle in cold, and needs regular resealing. Interlocking pavers behave differently because they are not a single mass. Each unit can shift fractionally with the ground while the whole surface stays intact, absorbing the stress of freeze-thaw cycles that would fracture a slab. The advantages extend beyond durability. A damaged paver can be lifted and replaced individually without patching the entire driveway, the surface is available for use the moment installation finishes rather than requiring a cure, and the range of colours, shapes, and laying patterns offers design flexibility that poured surfaces cannot match. For Ontario homeowners weighing long-term value, those qualities are the reason interlocking has become the standard for premium driveways — a focus of Target Landscaping’s interlocking installation services. The Base Is the Driveway: Excavation and Sub-Base Preparation The single most important truth about paver driveways is that the visible stone is only the final layer. A driveway must carry the weight of vehicles, so it begins with deep excavation — typically removing eight to twelve inches of soil for a driveway, considerably more than a walkway or patio requires. Once excavated, the exposed soil is graded to create a slope that drains water away from the home, then compacted. A geotextile fabric is often laid over the subsoil to separate it from the aggregate above, preventing the two from mixing and preserving the base’s load-bearing capacity over time. Crushed granular aggregate is then added in measured lifts, and each lift is compacted with a plate compactor before the next is placed. Skipping or rushing this layering is the most common cause of premature failure, because a base compacted all at once never reaches uniform density. Proper grading at this stage also governs whether water sheds correctly — the same drainage logic that underpins quality retaining wall construction, where managing water movement determines how long the structure survives. Laying the Pavers: Bedding, Pattern, and Edge Restraints With the compacted base in place, a thin, screeded layer of bedding sand provides the level setting bed for the pavers. The pavers themselves are then laid in the chosen pattern. For a driveway, the pattern is a structural decision, not only an aesthetic one: a herringbone layout interlocks the units against the turning and braking forces of vehicle traffic far better than a simple stacked or running bond, which is why it is the standard choice for surfaces that bear cars. Edge restraints are installed along the perimeter to lock the field of pavers in place. Without them, the outer units gradually spread outward under load and the whole surface loosens. Finally, the joints are filled — increasingly with polymeric sand, which hardens when wetted to resist washout, weed growth, and insect intrusion while still permitting the slight flexibility that makes interlocking systems work. A final pass with the plate compactor seats the pavers into the bedding and locks the joints. The same precision governs the company’s broader natural stone installations, where the integrity of the finished surface depends entirely on disciplined preparation beneath it. Permeable Pavers and Drainage Considerations Drainage deserves particular attention in Ontario. Standard installations are graded to direct surface water away from the foundation, but permeable paver systems offer an alternative that allows water to pass through wider, aggregate-filled joints into a specially designed open-graded base, where it infiltrates the ground rather than running off. These systems reduce pooling, ease pressure on municipal storm drainage, and can help with lot-level water management. Whether a standard or permeable approach suits a property depends on its grade, soil, and local requirements — a judgment an experienced installer makes during assessment. How to Choose a Driveway Paver Contractor in Ontario Because the base is invisible once the job is finished, homeowners cannot inspect the most important work after the fact, which makes the contractor’s integrity central. A capable installer demonstrates a verifiable record of completed driveways, explains the excavation depth and base build-up rather than glossing over it, and commits the specifications to a written quote. Ask specifically about excavation depth, the number of compacted lifts, the type of edge restraint, and whether polymeric jointing sand is included — vague answers on these points are a warning sign. Experience with Ontario conditions matters as well. A contractor who has built driveways through many local winters understands how frost depth, drainage, and soil type interact, and designs the base accordingly. Target Landscaping has worked in stone and hardscaping since 1998, and that longevity reflects the kind of accountability and craftsmanship a structural investment like a driveway deserves. Caring for an Interlocking Paver Driveway Maintenance is modest but worthwhile. Periodic sweeping, occasional rinsing, and topping up the joint sand every few years keep the surface stable and attractive. Sealing is optional
Natural Stone Landscaping in Brampton: What Every Homeowner Needs to Know Before Installing Stone
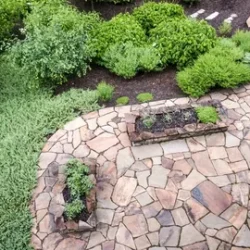
Natural stone landscaping is one of the most permanent and value-retaining investments a Brampton homeowner can make. Unlike manufactured alternatives, natural stone carries geological age, structural density, and surface variation that no factory process can replicate. Before calling a contractor, before selecting a stone type, and before approving a design, understanding how natural stone behaves in Brampton’s climate — and what expert installation actually involves — changes every decision you make. This guide covers the full scope of natural stone landscaping in Brampton: material selection, installation processes, stone type comparisons, climate considerations, and the difference between decorative placement and structural performance. What Is Natural Stone Landscaping? Natural stone landscaping refers to the design and installation of outdoor features using quarried stone — materials extracted directly from the earth rather than cast, pressed, or manufactured. In residential landscaping, natural stone appears in several functional and aesthetic roles: Stone patios — flat surfaces for outdoor living areas Flagstone walkways — irregular or cut stone paths connecting areas of a property Natural stone steps — stacked or cut stone used for grade transitions Retaining walls — structural stone walls that hold soil and manage elevation Garden edging and borders — stone used to define planting zones and beds Each of these applications involves different stone characteristics, different load and drainage requirements, and different installation methods. A stone patio and a retaining wall share the same raw material category but almost nothing else in their engineering logic. Why Brampton’s Climate Makes Natural Stone the Right Material Brampton, Ontario experiences a humid continental climate with hard winters, significant freeze-thaw cycling, and wet springs. This is not a hospitable climate for poured concrete or composite materials that crack and heave across temperature cycles. Natural stone, however, responds differently. Dense stone types — granite, limestone, and quartzite — absorb very little water. Low absorption rates mean less internal moisture during freeze cycles, which means fewer cracks and less surface spalling over time. This is the primary reason natural stone has been used for outdoor hardscaping in cold climates for centuries. Additionally, natural stone surfaces age in ways that appear intentional. What concrete shows as deterioration — surface pitting, staining, color fade — natural stone shows as patina. The material becomes more visually interesting over decades, not less. Stone Types Used in Brampton Landscaping Not all natural stone performs the same way, and the selection of stone type is one of the most consequential choices in any landscaping project. Limestone is widely used in Brampton for steps, walls, and flagging. It cuts cleanly, has a neutral gray-beige palette that complements most home exteriors, and stacks well for retaining structures. Its slightly higher porosity compared to granite requires sealing if used in high-traffic patio applications. Granite is the densest and hardest option. It is the preferred stone for steps and high-load walkways where compressive strength matters. Granite’s low absorption rate makes it especially well-suited to Brampton winters. Flagstone — which refers to a format rather than a single stone type — typically includes sandstone, slate, and quartzite cut into flat slabs. Flagstone installations range from dry-laid irregular patterns to mortared uniform grids. The variation in surface texture makes flagstone naturally slip-resistant, which is an important safety characteristic for outdoor steps and ramps. Fieldstone and boulders are used in naturalistic garden designs and as accent elements in retaining walls. These are unshaped stones placed for aesthetic continuity with natural landscapes. The Installation Process: What Expert Stone Work Actually Involves The visible result of natural stone landscaping — the finished patio, the completed walkway — represents only the final stage of a process that is mostly invisible. What separates durable installations from ones that shift, crack, or sink within two or three seasons is everything that happens before the first stone is placed. Site assessment and grading determine drainage patterns. Water must move away from the home’s foundation, not pool behind a retaining wall or under a patio. Incorrect grading is the most common cause of premature stone failure. Base preparation involves excavation to the appropriate depth — typically deeper for load-bearing applications like steps and walls — followed by compacted granular base material. The base layer absorbs movement, distributes weight, and provides the drainage layer that prevents frost heaving. Stone setting differs by application. Dry-laid flagstone over compacted sand allows for natural drainage and minor adjustment over time. Mortared installations are more rigid but require precise slope engineering at the base level. Retaining walls require batter (backward lean), drainage aggregate behind the wall face, and in taller walls, geotextile fabric or structural reinforcement. Finishing and sealing protect porous stone types and enhance color depth. Sealing is a maintenance step, not a structural one, and needs reapplication on a cycle depending on the stone type and sun exposure. Natural Stone Steps: The Most Technically Demanding Application Of all natural stone installations Brampton, steps carry the highest structural and safety requirements. Steps bear concentrated point loads from foot traffic, must maintain consistent rise and run dimensions for safe use, and must resist the lateral creep that freeze-thaw cycles introduce at every joint. Properly installed natural stone steps are anchored into the grade with a compacted base, set with sufficient overlap between treads, and positioned so that surface water drains forward off the tread rather than pooling. The weight of the stone itself contributes to stability, which is why dense stone types are preferred for this application over lighter alternatives. Target Landscaping has manufactured natural stone steps, walls, and flagstones since 1998 — a depth of experience that reflects how differently stone behaves across projects, seasons, and soil conditions. Choosing the Right Natural Stone Contractor in Brampton The quality of a natural stone installation is almost entirely a function of the installer’s knowledge and process discipline. The following criteria distinguish expert natural stone contractors from general landscapers who occasionally work with stone: Material sourcing — Expert installers work directly with stone suppliers and understand the variation within stone types. Not all limestone